First things first
TLDR; If you don't want to bother reading and care only about downloading the solution.
Get it HERE
This demo uses the cordova plugin built to work with the Cognex Mobile Barcode SDK.
The Cognex Mobile Barcode SDK (cmbSDK) is a simple, yet powerful tool for developing mobile barcode scanning applications.
Based on Cognex's flagship DataMan technology and the Cognex Barcode Scanning SDK, the cmbSDK provides developers with a powerful tool to create barcode scanning applications for the entire range of mobile scanning devices: from smartphones and tablets to the MX line of high-performance, industrial barcode scanners.
By adhering to a few simple guidelines, developers can write applications that will work with any supported MX mobile terminal or smartphone with little or no conditional code. The SDK achieves this by abstracting the device through a "reader" connection layer: once the application establishes its connection with the desired reader, a single, unified API is used to configure and interface with the device.
The SDK provides two basic readers: an “MX reader” for barcode scanning with devices like the MX-1000 and MX-1502, and a “camera reader” for barcode scanning using the built-in camera of the mobile device.
Here is an example of how one would go about integrating the cmbSDK within an Ionic mobile app.
About Ionic
Ionic is used for hybrid, cross-platform mobile app development utilizing HTML and JavaScript to present the user interface.
This provides the developer with reusable code that can be executed across platforms. It pairs with the PhoneGap/Cordova plugins to enable native access to each platform. The objective of this exercise is to try to show how the Cognex Mobile Barcode Scanner SDK may be used in a real-life app that is built using the Ionic cross-platform framework.
Simple steps to start
You should first install and configure the neccessary build tools for developing Ionic apps:
You may now download our sample app
- Download this (zip download - ionic-cmbsdk-demo-app)
- Unzip it to your preferred location and CD to that directory
- Install the dependencies for this project (our project depends on several Cordova plugins, including the CMBSDK Cordova plugin. Several other "default" plugins are installed when first creating a clean Ionic app). To install all dependencies, execute:
npm install
- When finished add our Cordova plugin published on npm
ionic cordova plugin add cmbsdk-cordova
- Add the platform (we will use android for our example)
ionic cordova platform add android
- You will need gradle to build for android. If you are using brew that would go like:
brew update && brew install gradle
For android make the gradlew writable so we can build / run from CLI (once you have the project loaded in Android Studio)
sudo chmod 755 /Users//platforms/android/gradlew
- Build or run the app with Android Studio... or run it from a command line with
ionic cordova run android -l -c
ionic cordova build android
- If you are building for iOS:
ionic cordova platform add ios
Once this is done, add a signing profile. Open the project in XCode and set your signing profile...
ionic cordova build ios
note: At the time this was developed, building for iOS sometimes failed with the message
Unhandled promise rejection (rejection id: 1): Error code 65 for command: xcodebuild with args: -xcconfig
to solve this be sure to have these dependencies installed:
npm install -g ios-sim
npm install -g ios-deploy
This seems to fix the problem to some extent, even though we noticed it can still fail with the same error.
ionic cordova run ios -l -c
- At this point you should have the app loaded on your device
Description of the solution
Probably the first place to visit, is the cmbscanner.ts provider which is located at
/project_folder/src/providers/cmbscanner/cmbscanner.ts
This is where we configure all the various cmbSDK settings.
As a general rule when working with the cmbSDK we want to enable symbologies or change output defaults in the global setConnectionStateDidChangeOfReaderCallback. Once we receive a connectionState = connected, we can do the magic with the symbologies that we want enabled or whatever other setting that we aim to use.
In our example we will just enable Image Graphics and a couple of symbologies:
 cmbScanner.setConnectionStateDidChangeOfReaderCallback( connectionState => {

  this.events.publish('connection:changed', connectionState);

  if (connectionState == cmbScanner.CONSTANTS.CONNECTION_STATE_CONNECTED){

   //image results should be set after we have a connection to the READER
   cmbScanner.enableImage(this.settings.enableImage);
   cmbScanner.enableImageGraphics(this.settings.enableImageGraphics);


   this.settings.enabledSymbols.forEach((v) => {
          this.allDone.push(cmbScanner.setSymbologyEnabled(v,true).then((symbResult : any) => {
           // console.log(JSON.stringify(symbResult));
           return symbResult;
          }));
   });

   Promise.all(this.allDone).then(results => {
    //when all is said and done
    this.isDone = true; //set the isDone flag

   });
   this.connected = true;
   cmbScanner.setTriggerType(this.settings.triggerType).then(result =>{
   });
  }
  else if(connectionState == cmbScanner.CONSTANTS.CONNECTION_STATE_DISCONNECTED){

   this.connected = false;

  }
 });
If you have a valid license key, you'd want to use it before loadScanner().
cmbScanner.registerSDK("key"); //you can add your license key here
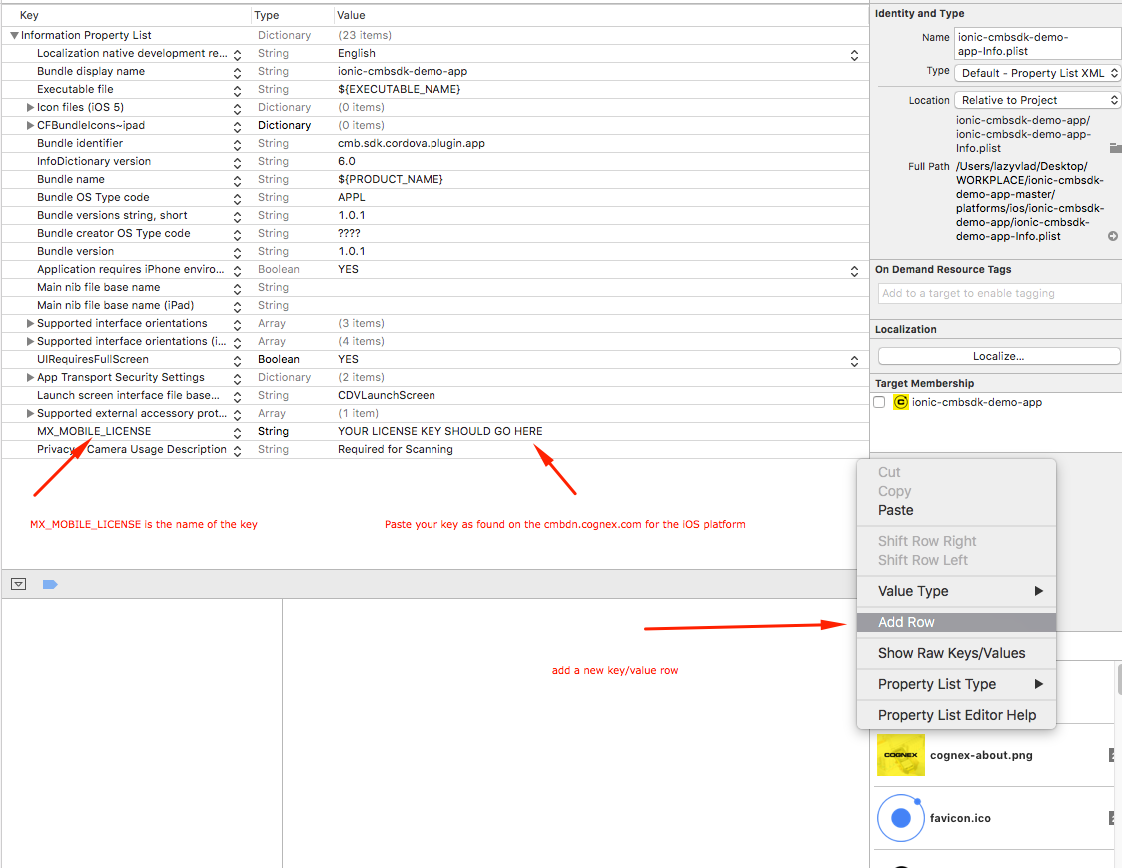
Alternatively, you can add the key directly in the manifest file (for android) or in the plist file for ios:
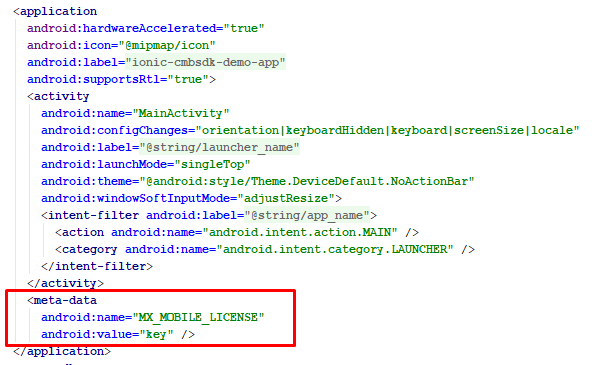
Or for the IOS platform
App features
The app has two modes of connection. The Camera Connector which will use the camera phone as a scanner, and the MX connector, which will use the MX device as a scanner
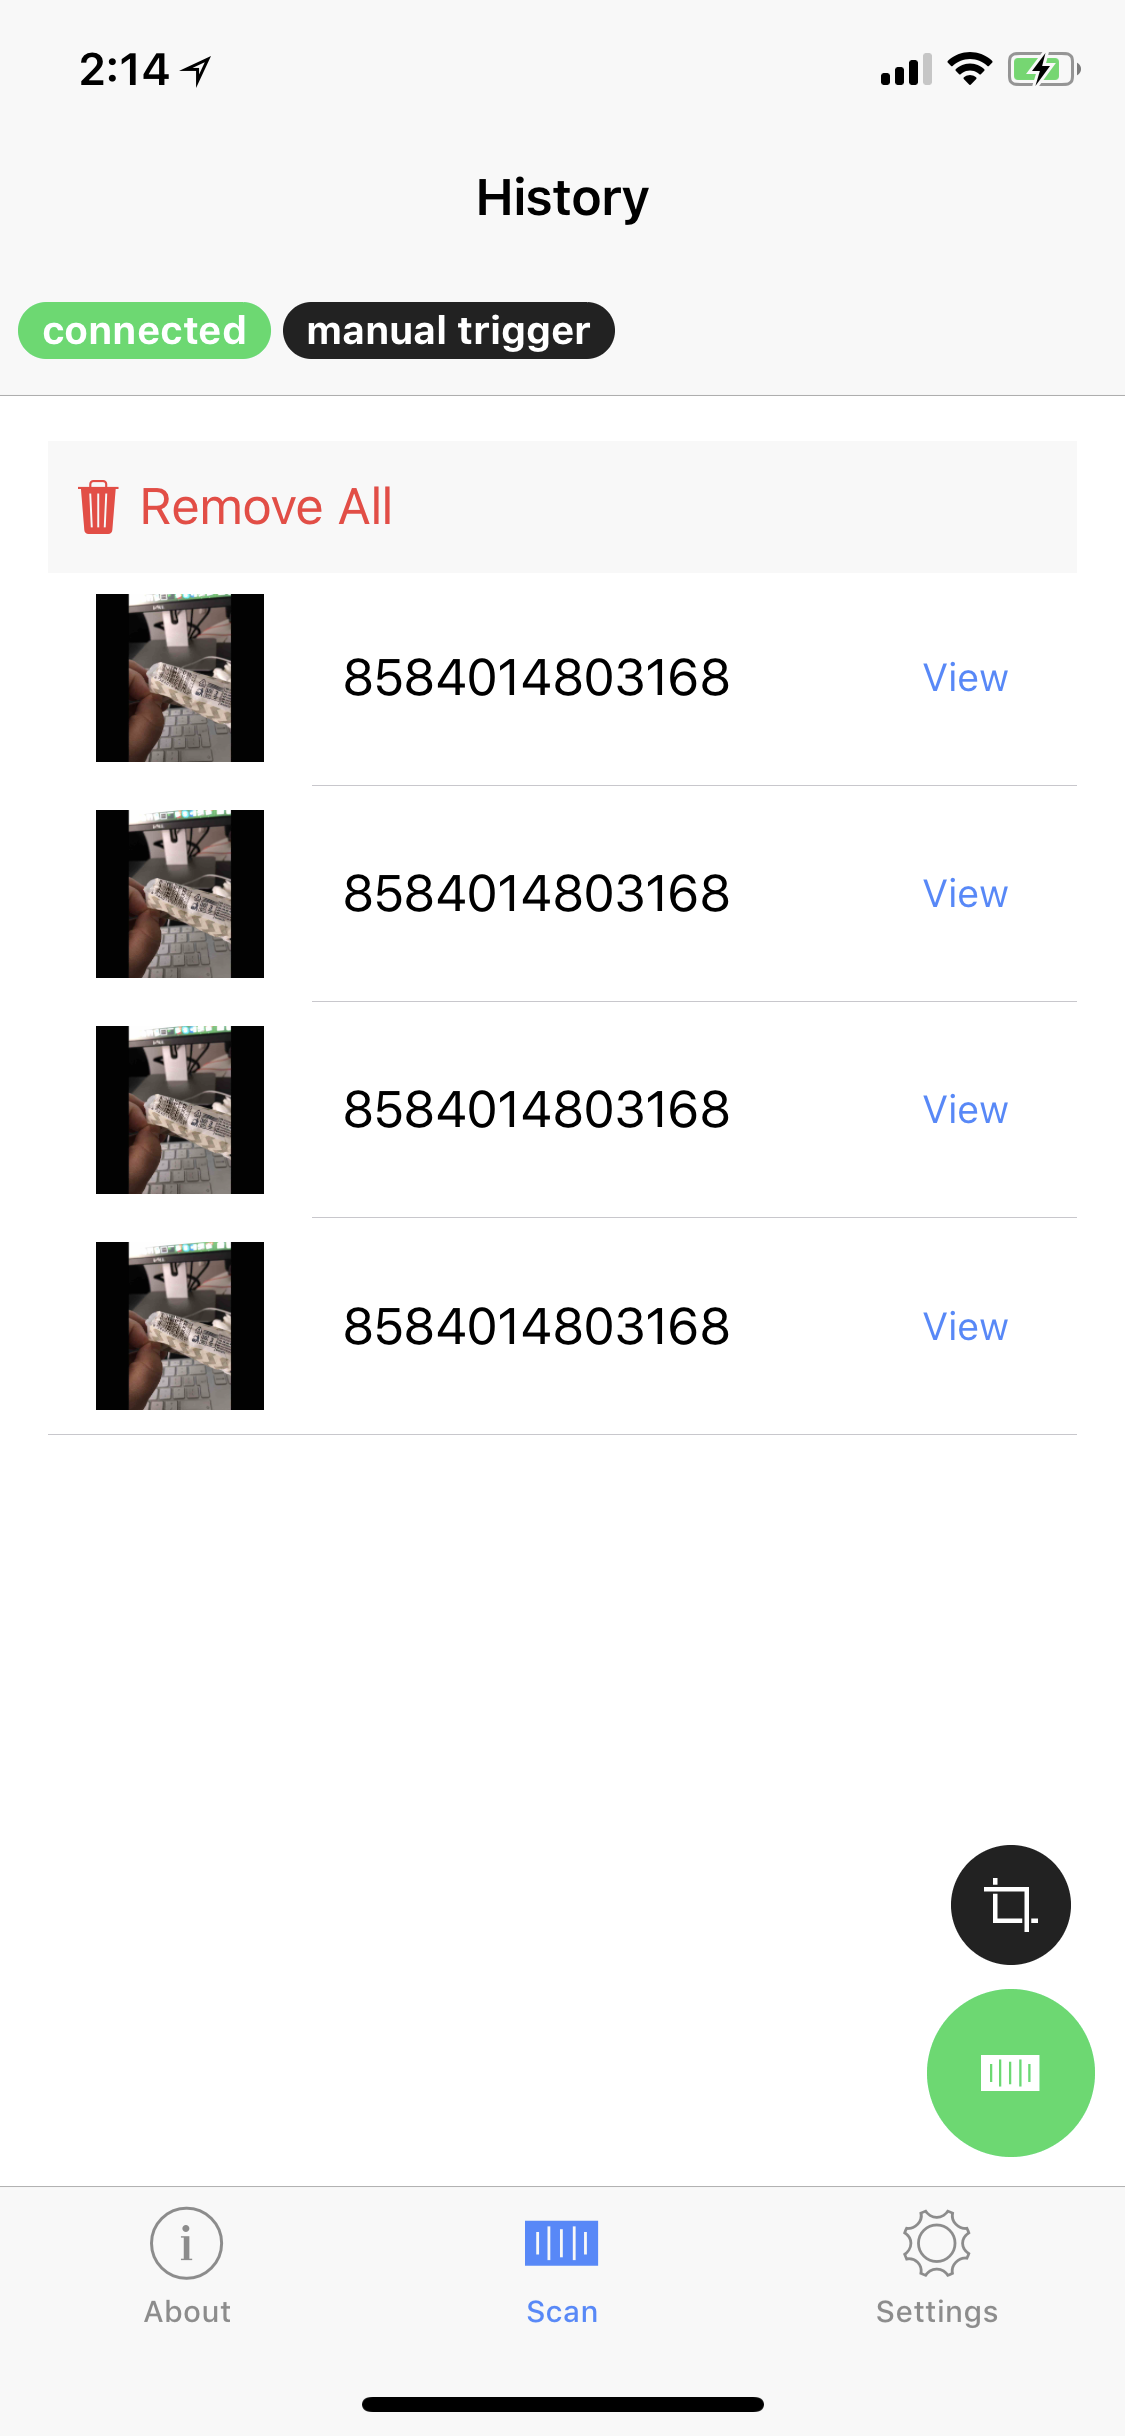
It also has two modes of trigger. You can either scan a code and get the result back, or stay in continuous mode and continue scanning while the scanned items are added to a list.
Storage
This example also uses the Ionic storage service. We want our settings to be persistent, but don't want to overcomplicate things, that's why the IONIC storage service is perfect for our task.
With the use of storage, we can have our scanned results saved and reused (or checked) at a later date.